Allure 报告工具
一个 WebdriverIO 报告插件,用于创建 Allure 测试报告。
安装
最简单的方法是将 @wdio/allure-reporter 作为 devDependency 包含在你的 package.json 中。
{
  "devDependencies": {
    "@wdio/allure-reporter": "^7.0.0"
  }
}
你可以简单地通过以下方式安装:
npm install @wdio/allure-reporter --save-dev
配置
在你的 wdio.conf.js 文件中配置输出目录:
export const config = {
    // ...
    reporters: [['allure', {
        outputDir: 'allure-results',
        disableWebdriverStepsReporting: true,
        disableWebdriverScreenshotsReporting: true,
    }]],
    // ...
}
outputDir默认为./allure-results。测试运行完成后,你会发现该目录中包含每个规格的.xml文件,以及一些.txt和.png文件和其他附件。disableWebdriverStepsReporting- 可选参数(默认为false),用于仅将自定义步骤记录到报告器中。issueLinkTemplate- 可选参数,用于指定问题链接模式。报告器将用addIssue(value)调用参数中指定的值替换{}占位符。如果使用 Cucumber 并在任何级别设置了issue标签,则应用相同的逻辑,它将在报告中转换为链接。参数值示例:https://example.org/issue/{}tmsLinkTemplate- 可选参数,用于指定 TMS(测试管理系统)链接模式。报告器将用addTestId(value)调用参数中指定的值替换{}占位符。如果使用 Cucumber 并在任何级别设置了testId标签,则应用相同的逻辑,它将在报告中转换为链接。参数值示例:https://example.org/tms/{}disableWebdriverScreenshotsReporting- 可选参数(默认为false),用于不将截图附加到报告器。useCucumberStepReporter- 可选参数(默认为false),使用 cucumber 时设置为 true 可以更改报告层次结构。自己尝试一下,看看效果如何。disableMochaHooks- 可选参数(默认为false),设置为 true 可以不将before/after堆栈跟踪/截图/结果钩子获取到 Allure 报告器中。addConsoleLogs- 可选参数(默认为false),设置为 true 可以将步骤的控制台日志附加到报告器。reportedEnvironmentVars(类型:Record<string, string>) - 设置此选项以在报告中显示环境变量。请注意,设置此项不会修改实际的环境变量。
支持的 Allure API
addLabel(name, value)- 为测试分配自定义标签addFeature(featureName)– 为测试分配功能addStory(storyName)– 为测试分配用户故事addSeverity(value)– 为测试分配严重性,接受以下值之一:blocker, critical, normal, minor, trivialaddTag(value)– 为测试分配标签addEpic(value)– 为测试分配史诗标签addOwner(value)– 为测试分配所有者标签addSuite(value)– 为测试分配套件标签addSubSuite(value)– 为测试分配子套件标签addParentSuite(value)– 为测试分配父套件标签addIssue(value)– 为测试分配问题 IDaddAllureId(value)– 为测试分配 allure 测试操作 ID 标签addTestId(value)– 为测试分配 TMS 测试 ID- ~~
addEnvironment(name, value)~~ – 不再工作的已弃用函数。请改用reportedEnvironmentVars addAttachment(name, content, [type])– 将附件保存到测试中。name(String) - 附件名称。content– 附件内容。type(String, 可选) – 附件 MIME 类型,默认为text/plain
addArgument(name, value)- 向测试添加额外参数addDescription(description, [type])– 向测试添加描述。description(String) - 测试的描述。type(String, 可选) – 描述类型,默认为text。值 ['text', 'html','markdown']
addStep(title, [{content, name = 'attachment'}], [status])- 向测试添加步骤。title(String) - 步骤的名称。content(String, 可选) - �步骤附件name(String, 可选) - 步骤附件名称,默认为attachment。status(String, 可选) - 步骤状态,默认为passed。必须是 "failed"、"passed" 或 "broken"
startStep(title)- 开始一个步骤title(String) - 步骤的名称。
endStep(status)- 结束一个步骤status(String, 可选) - 步骤状态,默认为passed。必须是 "failed"、"passed" 或 "broken"
step(name, body)- 开始带有内容函数的步骤。允许创建具有无限层次结构的步骤body(Function) - 步骤体异步函数
使用方法
可以通过以下方式访问 Allure Api:
CJS
const allureReporter = require('@wdio/allure-reporter').default
ESM
import allureReporter from '@wdio/allure-reporter'
Mocha 示例
describe('Suite', () => {
    it('Case', () => {
        allureReporter.addFeature('Feature')
    })
})
Cucumber
基本 Cucumber �示例:
Given('I include feature and story name', () => {
    allureReporter.addFeature('Feature_name');
    allureReporter.addStory('Story_name');
})
自定义步骤
step 方法简化了处理步骤的过程,因为每个步骤都表示为一个包含任何内容的异步函数。
函数的第一个参数是当前步骤,它具有大多数 allure API 方法(如 label、epic、attach 等):
allureReporter.step('my step name', async (s1) => {
    s1.label('foo', 'bar')
    await s1.step('my child step name', async (s2) => {
        // you can add any combination of steps in the body function
    })
})
Cucumber 标签
具有特殊名称(issue 和 testId)的 Cucumber 标签会转换为链接(必须先配置相应的链接模板):
@issue=BUG-1
@testId=TST-2
Feature: This is a feature with global tags that will be converted to Allure links

  @issue=BUG-3
  @testId=TST-4
  Scenario: This is a scenario with tags that will be converted to Allure links
    Given I do something
具有特殊名称(feature)的 Cucumber 标签会映射到 Allure 标签:
Feature: Test user role

  @feature=login
  Scenario: Login
    Given I test login
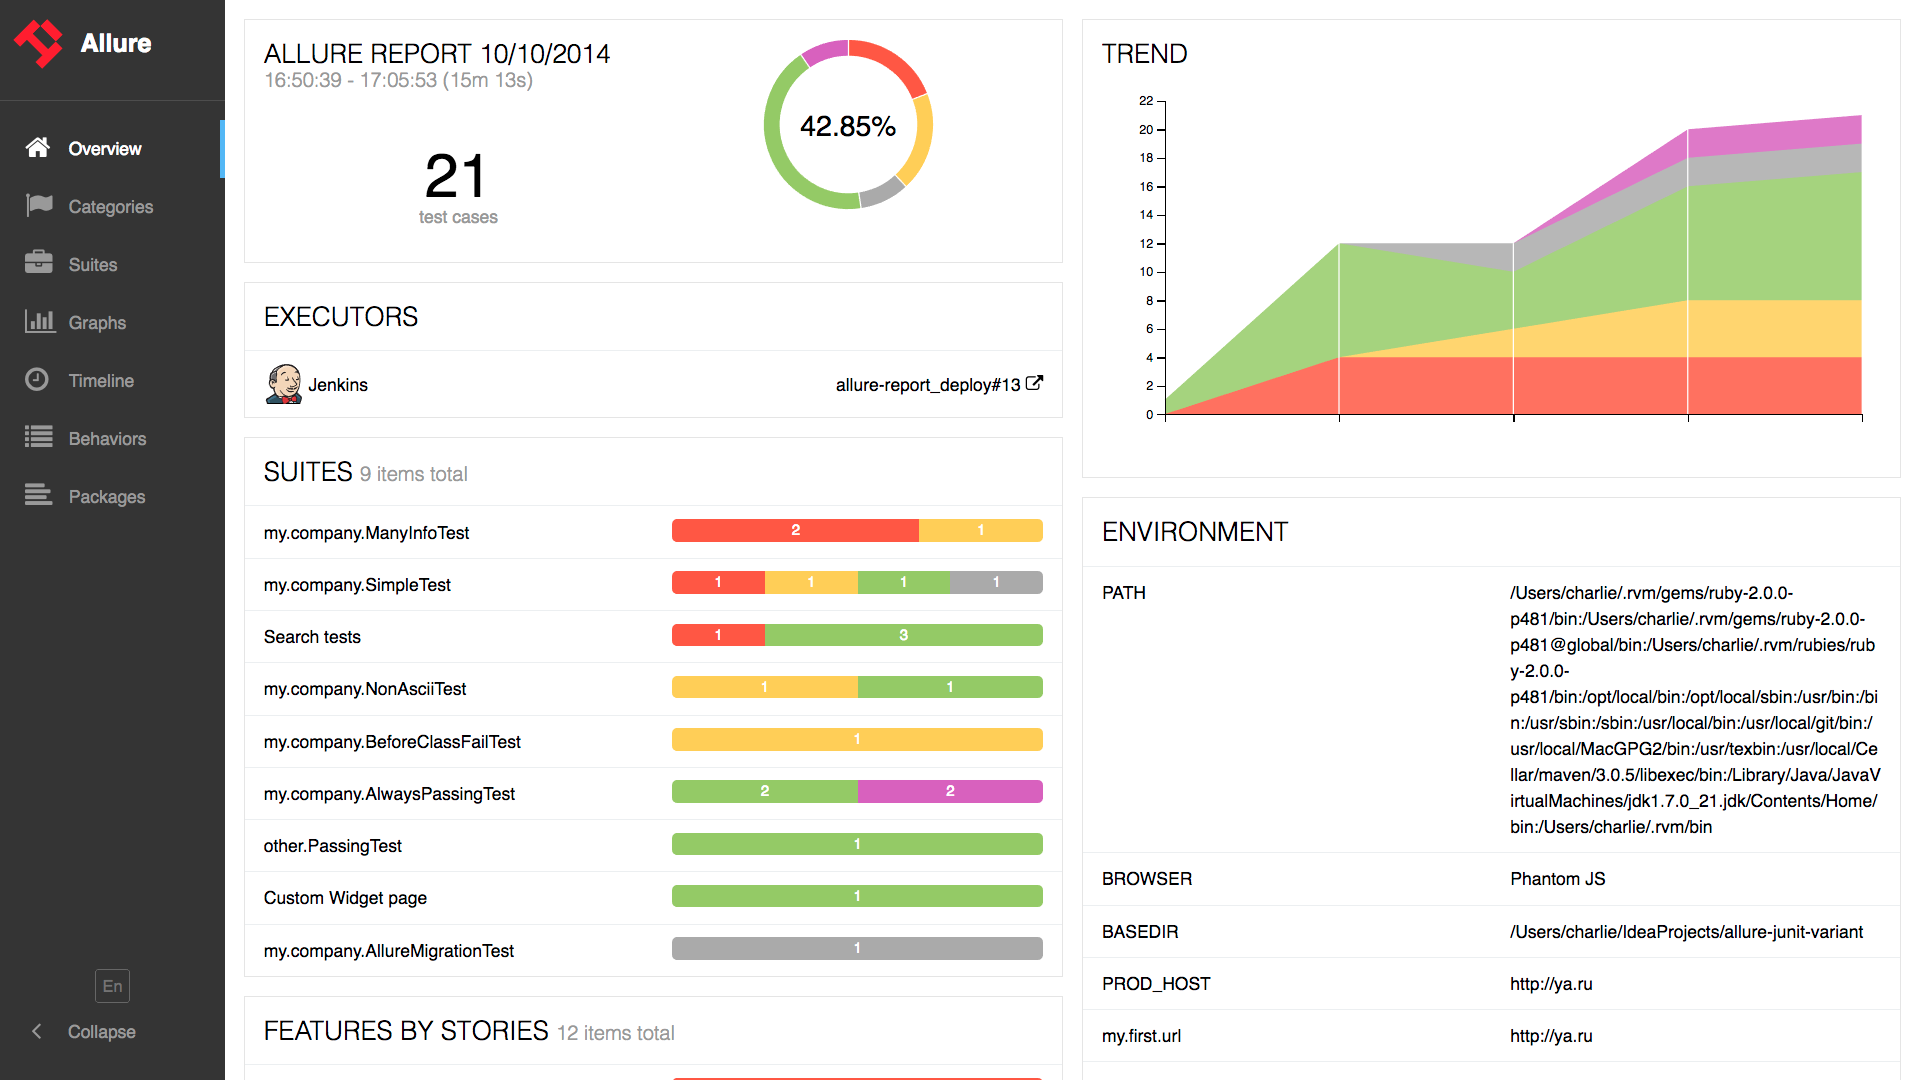
显示报告
结果可以被 Allure 提供的任何报告工具使用。例如:
命令行
安装 Allure 命令行工具,并处理结果目录:
allure generate [allure_output_dir] && allure open
这将生成报告(默认在 ./allure-report 中),并在浏览器中打开它。
自动生成报告
你也可以通过以编程方式使用 Allure 命令行工具自动生成报告。为此,通过以下方式在项目中安装该包:
npm i allure-commandline
然后添加或扩展你的 onComplete 钩子或为此创建一个自定义服务:
// wdio.conf.js
const allure = require('allure-commandline')

export const config = {
    // ...
    onComplete: function() {
        const reportError = new Error('Could not generate Allure report')
        const generation = allure(['generate', 'allure-results', '--clean'])
        return new Promise((resolve, reject) => {
            const generationTimeout = setTimeout(
                () => reject(reportError),
                5000)

            generation.on('exit', function(exitCode) {
                clearTimeout(generationTimeout)

                if (exitCode !== 0) {
                    return reject(reportError)
                }

                console.log('Allure report successfully generated')
                resolve()
            })
        })
    }
    // ...
}
Jenkins
安装并配置 Allure Jenkins 插件
添加截图
可以通过在 Mocha 和 Jasmine 的 afterTest 钩子或 Cucumber 的 afterStep 钩子中使用 WebDriverIO 的 takeScreenshot 函数将截图附加到报告中。
首先在报告器选项中设置 disableWebdriverScreenshotsReporting: false,然后在 afterStep 钩子中添加:
Mocha / Jasmine
afterTest: async function(test, context, { error, result, duration, passed, retries }) {
    if (error) {
        await browser.takeScreenshot();
    }
}
Cucumber
afterStep: async function (step, scenario, { error, duration, passed }, context) {
  if (error) {
    await browser.takeScreenshot();
  }
}
如上例所示,当调用此函数时,截图图像将附加到 allure 报告中。
