Фреймворки
WebdriverIO Runner має вбудовану підтримку Mocha, Jasmine і Cucumber.js. Ви також можете інтегрувати його зі сторонніми фреймворками з відкритим кодом, такими як Serenity/JS.
Для інтеграції WebdriverIO з тестовим фреймворком вам потрібен пакет адаптера, доступний в NPM. Зауважте, що пакет адаптера повинен бути встановлений в тому ж місці, де встановлений WebdriverIO. Тому, якщо ви встановили WebdriverIO глобально, переконайтеся, що пакет адаптера також встановлено глобально.
Інтеграція WebdriverIO з тестовим фреймворком дозволяє вам отримати доступ до екземпляра WebDriver, використовуючи глобальну змінну browser
у ваших файлах специфікацій або визначеннях кроків.
Зверніть увагу, що WebdriverIO також потурбується про створення та завершення сеансу Selenium, тому вам не потрібно робити це
самостійно.
Використання Mocha
Спочатку встановіть пакет адаптера з NPM:
- npm
- Yarn
- pnpm
- Bun
npm install @wdio/mocha-framework --save-dev
yarn add @wdio/mocha-framework --dev
pnpm add @wdio/mocha-framework --save-dev
bun add @wdio/mocha-framework --dev
За замовчуванням WebdriverIO надає бібліотеку тверджень, яка вбудована і з якою ви можете почати працювати відразу:
describe('my awesome website', () => {
    it('should do some assertions', async () => {
        await browser.url('https://webdriver.io')
        await expect(browser).toHaveTitle('WebdriverIO · Next-gen browser and mobile automation test framework for Node.js | WebdriverIO')
    })
})
WebdriverIO підтримує BDD (за замовчуванням), TDD та QUnit інтерфейси Mocha.
Якщо ви хочете писати свої тести в стилі TDD, встановіть властивість ui у вашій конфігурації mochaOpts на tdd. Тепер ваші тестові файли повинні бути написані так:
suite('my awesome website', () => {
    test('should do some assertions', async () => {
        await browser.url('https://webdriver.io')
        await expect(browser).toHaveTitle('WebdriverIO · Next-gen browser and mobile automation test framework for Node.js | WebdriverIO')
    })
})
Якщо ви хочете визначити інші специфічні для Mocha налаштування, ви можете зробити це за допомогою ключа mochaOpts у вашому конфігураційному файлі. Список усіх опцій можна знайти на веб-сайті проекту Mocha.
Примітка: WebdriverIO не підтримує застаріле використання зворотних викликів done в Mocha:
it('should test something', (done) => {
    done() // виникає помилка "done is not a function"
})
Опції Mocha
Наступні опції можна застосувати у вашому wdio.conf.js для налаштування вашого середовища Mocha. Примітка: не всі опції підтримуються, наприклад, застосування опції parallel призведе до помилки, оскільки WDIO тестовий запускач має власний спосіб запуску тестів паралельно. Ви можете передавати ці опції фреймворку як аргументи, наприклад:
wdio run wdio.conf.ts --mochaOpts.grep "my test" --mochaOpts.bail --no-mochaOpts.checkLeaks
Це передасть наступні опції Mocha:
{
    grep: ['my-test'],
    bail: true
    checkLeacks: false
}
Підтримуються наступні опції Mocha:
require
Опція require корисна, коли ви хочете додати або розширити деяку базову функціональність (опція фреймворку WebdriverIO).
Тип: string|string[]
За замовчуванням: []
compilers
Використовуйте дані модулі для компіляції файлів. Компілятори будуть включені перед вимогами (опція фреймворку WebdriverIO).
Тип: string[]
За замовчуванням: []
allowUncaught
Поширювати неперехоплені помилки.
Тип: boolean
За замовчуванням: false
bail
Припинити виконання після першого невдалого тесту.
Тип: boolean
За замовчуванням: false
checkLeaks
Перевіряти наявність витоків глобальних змінних.
Тип: boolean
За замовчуванням: false
delay
Затримка виконання кореневого набору.
Тип: boolean
За замовчуванням: false
fgrep
Фільтр тестів за заданим рядком.
Тип: string
За замовчуванням: null
forbidOnly
Тести з позначкою only призводять до невдачі набору.
Тип: boolean
За замовчуванням: false
forbidPending
Відкладені тести призводять до невдачі набору.
Тип: boolean
За замовчуванням: false
fullTrace
Повний стек викликів при невдачі.
Тип: boolean
За замовчуванням: false
global
Змінні, які очікуються в глобальній області.
Тип: string[]
За замовчуванням: []
grep
Фільтр тестів за заданим регулярним виразом.
Тип: RegExp|string
За замовчуванням: null
invert
Інвертувати відповідності фільтра тестів.
Тип: boolean
За замовчуванням: false
retries
Кількість спроб повторного запуску невдалих тестів.
Тип: number
За замовчуванням: 0
timeout
Значення порогу таймауту (в мс).
Тип: number
За замовчуванням: 30000
Використання Jasmine
Спочатку встановіть пакет адаптера з NPM:
- npm
- Yarn
- pnpm
- Bun
npm install @wdio/jasmine-framework --save-dev
yarn add @wdio/jasmine-framework --dev
pnpm add @wdio/jasmine-framework --save-dev
bun add @wdio/jasmine-framework --dev
Потім ви можете налаштувати своє середовище Jasmine, встановивши властивість jasmineOpts у вашій конфігурації. Список усіх опцій можна знайти на веб-сайті проекту Jasmine.
Опції Jasmine
Наступні опції можна застосувати у вашому wdio.conf.js для налаштування вашого середовища Jasmine за допомогою властивості jasmineOpts. Для отримання додаткової інформації про ці опції конфігурації, перегляньте документацію Jasmine. Ви можете передавати ці опції фреймворку як аргументи, наприклад:
wdio run wdio.conf.ts --jasmineOpts.grep "my test" --jasmineOpts.failSpecWithNoExpectations --no-jasmineOpts.random
Це передасть наступні опції Mocha:
{
    grep: ['my-test'],
    bail: true
    checkLeacks: false
}
Підтримуються наступні опції Jasmine:
defaultTimeoutInterval
Інтервал таймауту за замовчуванням для операцій Jasmine.
Тип: number
За замовчуванням: 60000
helpers
Масив шляхів до файлів (і шаблонів glob) відносно spec_dir для включення перед специфікаціями Jasmine.
Тип: string[]
За замовчуванням: []
requires
Опція requires корисна, коли ви хочете додати або розширити деяку базову функціональність.
Тип: string[]
За замовчуванням: []
random
Чи рандомізувати порядок виконання тестів.
Тип: boolean
За замовчуванням: true
seed
Початкове значення для рандомізації. Null призводить до того, що початкове значення визначається випадковим чином на початку виконання.
Тип: Function
За замовчуванням: null
failSpecWithNoExpectations
Чи позначати тест як невдалий, якщо в ньому не було очікувань. За замовчуванням тест, в якому не було очікувань, позначається як успішний. Встановлення цього значення в true призведе до того, що такий тест буде позначено як невдалий.
Тип: boolean
За замовчуванням: false
oneFailurePerSpec
Чи має тест лише одне очікування невдачі.
Тип: boolean
За замовчуванням: false
specFilter
Функція для фільтрації тестів.
Тип: Function
За замовчуванням: (spec) => true
grep
Запускати лише тести, що відповідають цьому рядку або регулярному виразу. (Застосовується лише якщо не встановлена користувацька функція specFilter)
Тип: string|Regexp
За замовчуванням: null
invertGrep
Якщо true, інвертує відповідність тестів і запускає лише тести, які не відповідають виразу в grep. (Застосовується лише якщо не встановлена користувацька функція specFilter)
Тип: boolean
За замовчуванням: false
Використання Cucumber
Спочатку встановіть пакет адаптера з NPM:
- npm
- Yarn
- pnpm
- Bun
npm install @wdio/cucumber-framework --save-dev
yarn add @wdio/cucumber-framework --dev
pnpm add @wdio/cucumber-framework --save-dev
bun add @wdio/cucumber-framework --dev
Якщо ви хочете використовувати Cucumber, встановіть властивість framework на cucumber, додавши framework: 'cucumber' до конфігураційного файлу.
Опції для Cucumber можна вказати в конфігураційному файлі за допомогою cucumberOpts. Ознайомтеся з повним списком опцій тут.
Щоб швидко почати роботу з Cucumber, подивіться наш проект cucumber-boilerplate, який містить усі визначення кроків, необхідні для початку, і ви зможете відра�зу писати файли features.
Опції Cucumber
Наступні опції можна застосувати у вашому wdio.conf.js для налаштування вашого середовища Cucumber за допомогою властивості cucumberOpts:
Опції cucumberOpts, такі як користувацькі tags для фільтрації тестів, можна вказати через командний рядок. Це здійснюється за допомогою формату cucumberOpts.{optionName}="value".
Наприклад, якщо ви хочете запустити лише тести, позначені тегом @smoke, ви можете використати наступну команду:
# Якщо ви хочете запустити лише тести з тегом "@smoke"
npx wdio run ./wdio.conf.js --cucumberOpts.tags="@smoke"
npx wdio run ./wdio.conf.js --cucumberOpts.name="some scenario name" --cucumberOpts.failFast
Ця команда встановлює опцію tags в cucumberOpts на @smoke, забезпечуючи виконання лише тестів з цим тегом.
backtrace
Показати повний трасування для помилок.
Тип: Boolean
За замовчуванням: true
requireModule
Вимагати модулі перед завантаженням будь-яких файлів підтримки.
Тип: string[]
За замовчуванням: []
Приклад:
cucumberOpts: {
    requireModule: ['@babel/register']
    // або
    requireModule: [
        [
            '@babel/register',
            {
                rootMode: 'upward',
                ignore: ['node_modules']
            }
        ]
    ]
 }
failFast
Перервати виконання при першій невдачі.
Тип: boolean
За замовчуванням: false
name
Виконувати лише сценарії з іменами, що відповідають виразу (повторюване).
Тип: RegExp[]
За замовчуванням: []
require
Вимагати файли, що містять ваші визначення кроків, перед виконанням функцій. Ви також можете вказати шаблон glob для ваших визначень кроків.
Тип: string[]
За замовчуванням: []
Приклад:
cucumberOpts: {
    require: [path.join(__dirname, 'step-definitions', 'my-steps.js')]
}
import
Шляхи до вашого коду підтримки, для ESM.
Тип: String[]
За замовчуванням: []
Приклад:
cucumberOpts: {
    import: [path.join(__dirname, 'step-definitions', 'my-steps.js')]
}
strict
Невдача, якщо є невизначені або �відкладені кроки.
Тип: boolean
За замовчуванням: false
tags
Виконувати лише функції або сценарії з тегами, що відповідають виразу. Будь ласка, дивіться документацію Cucumber для більш детальної інформації.
Тип: String
За замовчуванням: ``
timeout
Таймаут у мілісекундах для визначень кроків.
Тип: Number
За замовчуванням: 30000
retry
Вказати кількість спроб повторення невдалих тестових випадків.
Тип: Number
За замовчуванням: 0
retryTagFilter
Повторювати лише функції або сценарії з тегами, що відповідають виразу (повторюване). Ця опція вимагає вказати '--retry'.
Тип: RegExp
language
Мова за замовчуванням для ваших файлів функцій
Тип: String
За замовчуванням: en
order
Запускати тести у визначеному / випадковому порядку
Тип: String
За замовчуванням: defined
format
Ім'я та шлях виходу форматувача для використання. WebdriverIO в основному підтримує лише Форматувачі, які записують вихід у файл.
Тип: string[]
formatOptions
Опції, які надаються форматувачам
Тип: object
tagsInTitle
Додавати теги cucumber до назви функції або сценарію
Тип: Boolean
За замовчуванням: false
Зверніть увагу, що це специфічна опція @wdio/cucumber-framework і не розпізнається самим cucumber-js
ignoreUndefinedDefinitions
Розглядати невизначені визначення як попередження.
Тип: Boolean
За замовчуванням: false
Зверніть увагу, що це специфічна опція @wdio/cucumber-framework і не розпізнається самим cucumber-js
failAmbiguousDefinitions
Розглядати неоднозначні визначення як помилки.
Тип: Boolean
За замовчуванням: false
Зверніть увагу, що це специфічна опція @wdio/cucumber-framework і не розпізнається самим cucumber-js
tagExpression
Виконувати лише функції або сценарії з тегами, що відповідають виразу. Будь ласка, дивіться документацію Cucumber для більш детальної інформації.
Тип: String
За замовчуванням: ``
Зверніть увагу, що ця опція буде застаріла в майбутньому. Замість цього використовуйте властивість конфігурації tags
profile
Вказати профіль для використання.
Тип: string[]
За замовчуванням: []
Будь ласка, зверніть увагу, що в профілях підтримуються лише певні значення (worldParameters, name, retryTagFilter), оскільки cucumberOpts має пріоритет. Крім того, при використанні профілю переконайтеся, що згадані значення не оголошені в cucumberOpts.
Пропуск тестів в cucumber
Зверніть увагу, що якщо ви хочете пропустити тест, використовуючи звичайні можливості фільтрації тестів cucumber, доступні в cucumberOpts, ви зробите це для всіх браузерів і пристроїв, налаштованих в можливостях. Щоб мати можливість пропускати сценарії лише для певних комбінацій можливостей без необхідності запуску сесії, якщо це не потрібно, webdriverio надає наступний спеціальний синтаксис тегів для cucumber:
@skip([condition])
де condition - це необов'язкова комбінація властивостей можливостей з їх значеннями, які, коли всі вони збігаються, призведуть до пропуску позначеного сценарію або функції. Звичайно, ви можете додати кілька тегів до сценаріїв і функцій, щоб пропускати тести за різних умов.
Ви також можете використовувати анотацію '@skip' для пропуску тестів без зміни `tagExpression'. У цьому випадку пропущені тести будуть відображені в тестовому звіті.
Ось кілька прикладів цього синтаксису:
@skipабо@skip(): завжди пропускати позначений елемент@skip(browserName="chrome"): тест не буде виконуватися в браузерах chrome.@skip(browserName="firefox";platformName="linux"): пропустити тест при виконанні в firefox на linux.@skip(browserName=["chrome","firefox"]): позначені елементи будуть пропущені для браузерів chrome і firefox.@skip(browserName=/i.*explorer/): можливості з браузерами, що відповідають регулярному виразу, будуть пропущені (як-отiexplorer,internet explorer,internet-explorer, ...).
Імпорт хелпера визначення кроків
Щоб використовувати хелпер визначення кроків, такі як Given, When або Then або хуки, вам потрібно імпортувати їх з @cucumber/cucumber, наприклад, так:
import { Given, When, Then } from '@cucumber/cucumber'
Тепер, якщо ви вже використовуєте Cucumber для інших типів тестів, не пов'язаних з WebdriverIO, для яких ви використовуєте певну версію, вам потрібно імпортувати ці хелпери у ваших e2e тестах з пакету WebdriverIO Cucumber, наприклад:
import { Given, When, Then, world, context } from '@wdio/cucumber-framework'
Це забезпечує використання правильних хелперів у фреймворку WebdriverIO і дозволяє використовувати незалежну версію Cucumber для інших типів тестування.
Публікація звіту
Cucumber надає функцію для публікації звітів про виконання тестів на https://reports.cucumber.io/, якою можна керувати, встановивши прапорець publish в cucumberOpts або налаштувавши змінну середовища CUCUMBER_PUBLISH_TOKEN. Однак, коли ви використовуєте WebdriverIO для виконання �тестів, існує обмеження з цим підходом. Він оновлює звіти окремо для кожного файлу функцій, ускладнюючи перегляд консолідованого звіту.
Щоб подолати це обмеження, ми представили метод на основі промісів під назвою publishCucumberReport в @wdio/cucumber-framework. Цей метод слід викликати в хуку onComplete, який є оптимальним місцем для його виклику. publishCucumberReport вимагає вхідних даних про каталог звітів, де зберігаються повідомлення cucumber.
Ви можете генерувати звіти cucumber message, налаштувавши опцію format у ваших cucumberOpts. Настійно рекомендується надавати динамічне ім'я файлу в опції формату cucumber message, щоб запобігти перезапису звітів і забезпечити точне запис кожного тестового запуску.
Перед використанням цієї функції переконайтеся, що встановлено наступні змінні середовища:
- CUCUMBER_PUBLISH_REPORT_URL: URL, куди ви хочете опублікувати звіт Cucumber. Якщо він не вказаний, буде використовуватися URL за замовчуванням 'https://messages.cucumber.io/api/reports'.
- CUCUMBER_PUBLISH_REPORT_TOKEN: Токен авторизації, необхідний для публікації звіту. Якщо цей токен не встановлено, функція вийде без публікації звіту.
Ось приклад необхідних конфігурацій та зразків коду для реалізації:
import { v4 as uuidv4 } from 'uuid'
import { publishCucumberReport } from '@wdio/cucumber-framework';

export const config = {
    // ... Інші опції конфігурації
    cucumberOpts: {
        // ... Конфігурація опцій Cucumber
        format: [
            ['message', `./reports/${uuidv4()}.ndjson`],
            ['json', './reports/test-report.json']
        ]
    },
    async onComplete() {
        await publishCucumberReport('./reports');
    }
}
Зверніть увагу, що ./reports/ - це каталог, де будуть зберігатися звіти cucumber message.
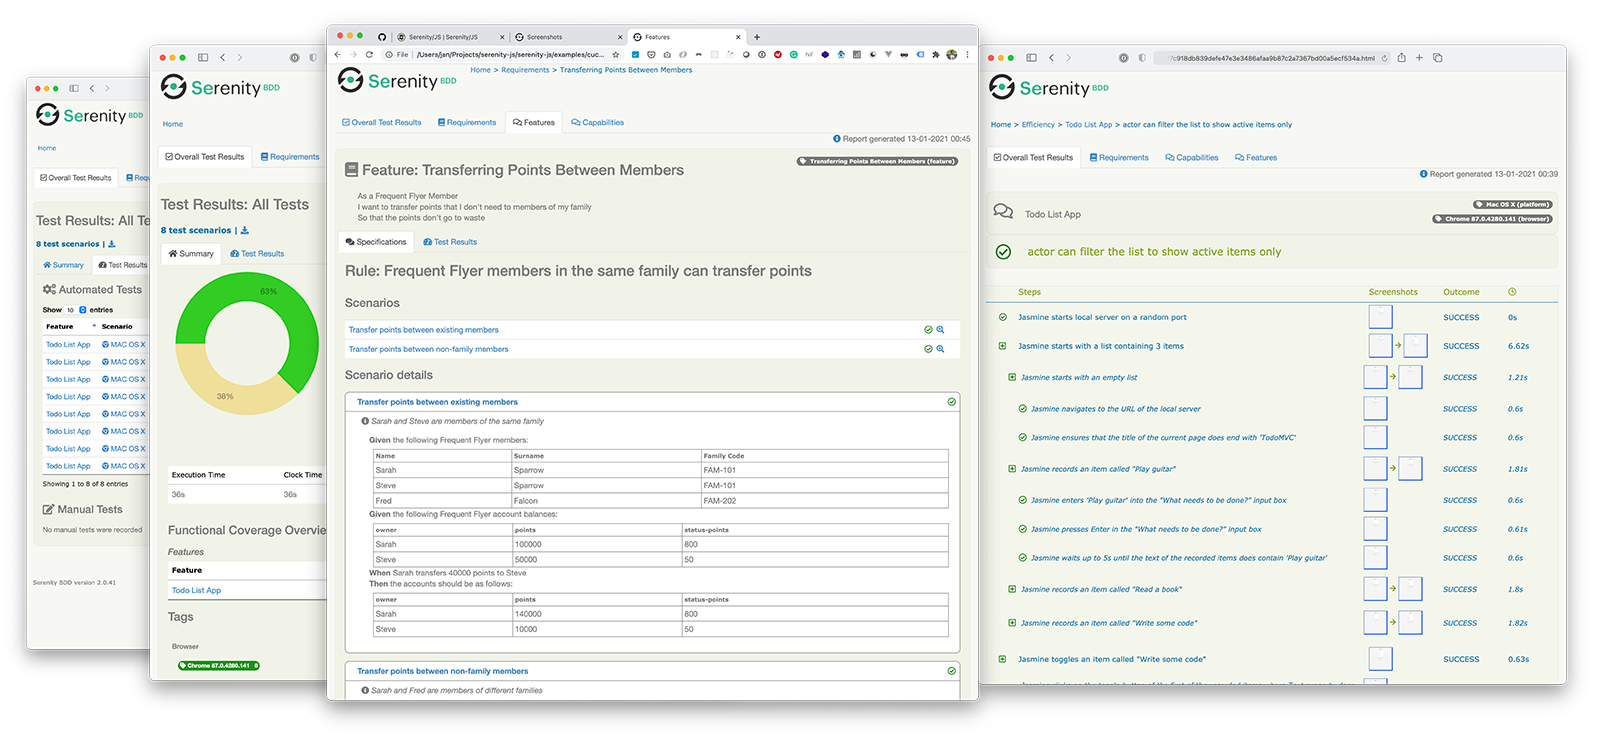
Використання Serenity/JS
Serenity/JS - це фреймворк з відкритим кодом, розроблений для того, щоб зробити приймальне та регресійне тестування складних програмних систем швидшим, більш спільним та простішим для масштабування.
Для тестових наборів WebdriverIO, Serenity/JS пропонує:
- Розширена звітність - Ви можете використовувати Serenity/JS як заміну будь-якого вбудованого фреймворку WebdriverIO для створення глибоких звітів про виконання тестів та живої документації вашого проекту.
- API шаблону Screenplay - Щоб зробити ваш тестовий код портативним та повторно використовуваним у проектах та командах, Serenity/JS надає вам опціональний абстрактний шар на основі нативних API WebdriverIO.
- Інтеграційні бібліотеки - Для тестових наборів, що використовують шаблон Screenplay, Serenity/JS також надає опціональні інтеграційні бібліотеки, щоб допомогти вам писати API-тести, керувати локальними серверами, виконувати твердження та багато іншого!
Встановлення Serenity/JS
Щоб додати Serenity/JS до існуючого проекту WebdriverIO, встановіть наступні модулі Serenity/JS з NPM:
- npm
- Yarn
- pnpm
- Bun
npm install @serenity-js/{core,web,webdriverio,assertions,console-reporter,serenity-bdd} --save-dev
yarn add @serenity-js/{core,web,webdriverio,assertions,console-reporter,serenity-bdd} --dev
pnpm add @serenity-js/{core,web,webdriverio,assertions,console-reporter,serenity-bdd} --save-dev
bun add @serenity-js/{core,web,webdriverio,assertions,console-reporter,serenity-bdd} --dev
Дізнайтеся більше про модулі Serenity/JS:
@serenity-js/core@serenity-js/web@serenity-js/webdriverio@serenity-js/assertions@serenity-js/console-reporter@serenity-js/serenity-bdd
Налаштування Serenity/JS
Щоб увімкнути інтеграцію з Serenity/JS, налаштуйте WebdriverIO наступним чином:
- TypeScript
- JavaScript
import { WebdriverIOConfig } from '@serenity-js/webdriverio';
export const config: WebdriverIOConfig = {
// Вказати WebdriverIO використовувати фреймворк Serenity/JS
framework: '@serenity-js/webdriverio',
// Налаштування Serenity/JS
serenity: {
// Налаштувати Serenity/JS для використання відповідного адаптера для вашого тестового запускача
runner: 'cucumber',
// runner: 'mocha',
// runner: 'jasmine',
// Зареєструвати сервіси звітності Serenity/JS, так звану "stage crew"
crew: [
// Опціонально, виводити результати вик�онання тестів у стандартний вивід
'@serenity-js/console-reporter',
// Опціонально, створювати звіти Serenity BDD та живу документацію (HTML)
'@serenity-js/serenity-bdd',
[ '@serenity-js/core:ArtifactArchiver', { outputDirectory: 'target/site/serenity' } ],
// Опціонально, автоматично робити знімки екрану при невдачі взаємодії
[ '@serenity-js/web:Photographer', { strategy: 'TakePhotosOfFailures' } ],
]
},
// Налаштувати ваш запускач Cucumber
cucumberOpts: {
// див. опції налаштування Cucumber нижче
},
// ... або запускач Jasmine
jasmineOpts: {
// див. опції налаштування Jasmine нижче
},
// ... або запускач Mocha
mochaOpts: {
// див. опції налаштування Mocha нижче
},
runner: 'local',
// Будь-які інші налаштування WebdriverIO
};
export const config = {
// Вказати WebdriverIO використовувати фреймворк Serenity/JS
framework: '@serenity-js/webdriverio',
// Налаштування Serenity/JS
serenity: {
// Налаштувати Serenity/JS для використання відповідного адаптера для вашого тестового запускача
runner: 'cucumber',
// runner: 'mocha',
// runner: 'jasmine',
// Зареєструвати сервіси звітності Serenity/JS, так звану "stage crew"
crew: [
'@serenity-js/console-reporter',
'@serenity-js/serenity-bdd',
[ '@serenity-js/core:ArtifactArchiver', { outputDirectory: 'target/site/serenity' } ],
[ '@serenity-js/web:Photographer', { strategy: 'TakePhotosOfFailures' } ],
]
},
// Нала�штувати ваш запускач Cucumber
cucumberOpts: {
// див. опції налаштування Cucumber нижче
},
// ... або запускач Jasmine
jasmineOpts: {
// див. опції налаштування Jasmine нижче
},
// ... або запускач Mocha
mochaOpts: {
// див. опції налаштування Mocha нижче
},
runner: 'local',
// Будь-які інші налаштування WebdriverIO
};
Дізнайтеся більше про:
- Опції налаштування Cucumber для Serenity/JS
- Опції налаштування Jasmine для Serenity/JS
- Опції налаштування Mocha для Serenity/JS
- Конфігураційний файл WebdriverIO
Створення звітів Serenity BDD та живої документації
Звіти Serenity BDD та жива документація генеруються за допомогою Serenity BDD CLI,
Java-програми, яка завантажується та керується модулем @serenity-js/serenity-bdd.
Щоб створити звіти Serenity BDD, ваш тестовий набір повинен:
- завантажити Serenity BDD CLI, викликавши
serenity-bdd update, що кешує CLIjarлокально - створити проміжні звіти Serenity BDD
.json, зареєструвавшиSerenityBDDReporterвідповідно до інструкцій з налаштування - викликати Serenity BDD CLI, коли ви хочете створити звіт, викликавши
serenity-bdd run
Шаблон, який використовується всіма шаблонами проектів Serenity/JS, базується на використанні:
- скрипту NPM
postinstallдля завантаження Serenity BDD CLI npm-failsafeдля запуску процесу звітування, навіть якщо сам тестовий набір завершився невдачею (саме тоді, коли вам найбільше потрібні тестові звіти...)rimrafяк зручний метод для видалення будь-яких тестових звітів, що залишилися від попереднього запуску
{
  "scripts": {
    "postinstall": "serenity-bdd update",
    "clean": "rimraf target",
    "test": "failsafe clean test:execute test:report",
    "test:execute": "wdio wdio.conf.ts",
    "test:report": "serenity-bdd run"
  }
}
Щоб дізнатися більше про SerenityBDDReporter, будь ласка, зверніться до:
- інструкцій з встановлення у документації
@serenity-js/serenity-bdd, - прикладів налаштування у документації API
SerenityBDDReporter, - прикладів Serenity/JS на GitHub.
Використання API шаблону Screenplay у Serenity/JS
Шаблон Screenplay - це інноваційний, орієнтований на користувача підхід до написання високоякісних автоматизованих приймальних тестів. Він спрямовує вас на ефективне використання шарів абстракції, допомагає вашим тестовим сценаріям відображати бізнес-словник вашого домену та заохочує хороші практики тестування та розробки програмного забезпечення у вашій команді.
За замовчуванням, коли ви реєструєте @serenity-js/webdriverio як ваш framework у WebdriverIO,
Serenity/JS налаштовує акторський каст за замовчуванням акторів,
де кожен актор може:
Цього має бути достатньо, щоб допомогти вам почати вводити тестові сценарії, які відповідають шаблону Screenplay, навіть у наявний тестовий набір, наприклад:
import { actorCalled } from '@serenity-js/core'
import { Navigate, Page } from '@serenity-js/web'
import { Ensure, equals } from '@serenity-js/assertions'

describe('My awesome website', () => {
    it('can have test scenarios that follow the Screenplay Pattern', async () => {
        await actorCalled('Alice').attemptsTo(
            Navigate.to(`https://webdriver.io`),
            Ensure.that(
                Page.current().title(),
                equals(`WebdriverIO · Next-gen browser and mobile automation test framework for Node.js | WebdriverIO`)
            ),
        )
    })

    it('can have non-Screenplay scenarios too', async () => {
        await browser.url('https://webdriver.io')
        await expect(browser)
            .toHaveTitle('WebdriverIO · Next-gen browser and mobile automation test framework for Node.js | WebdriverIO')
    })
})
Щоб дізнатися більше про шаблон Screenplay, перегляньте:
