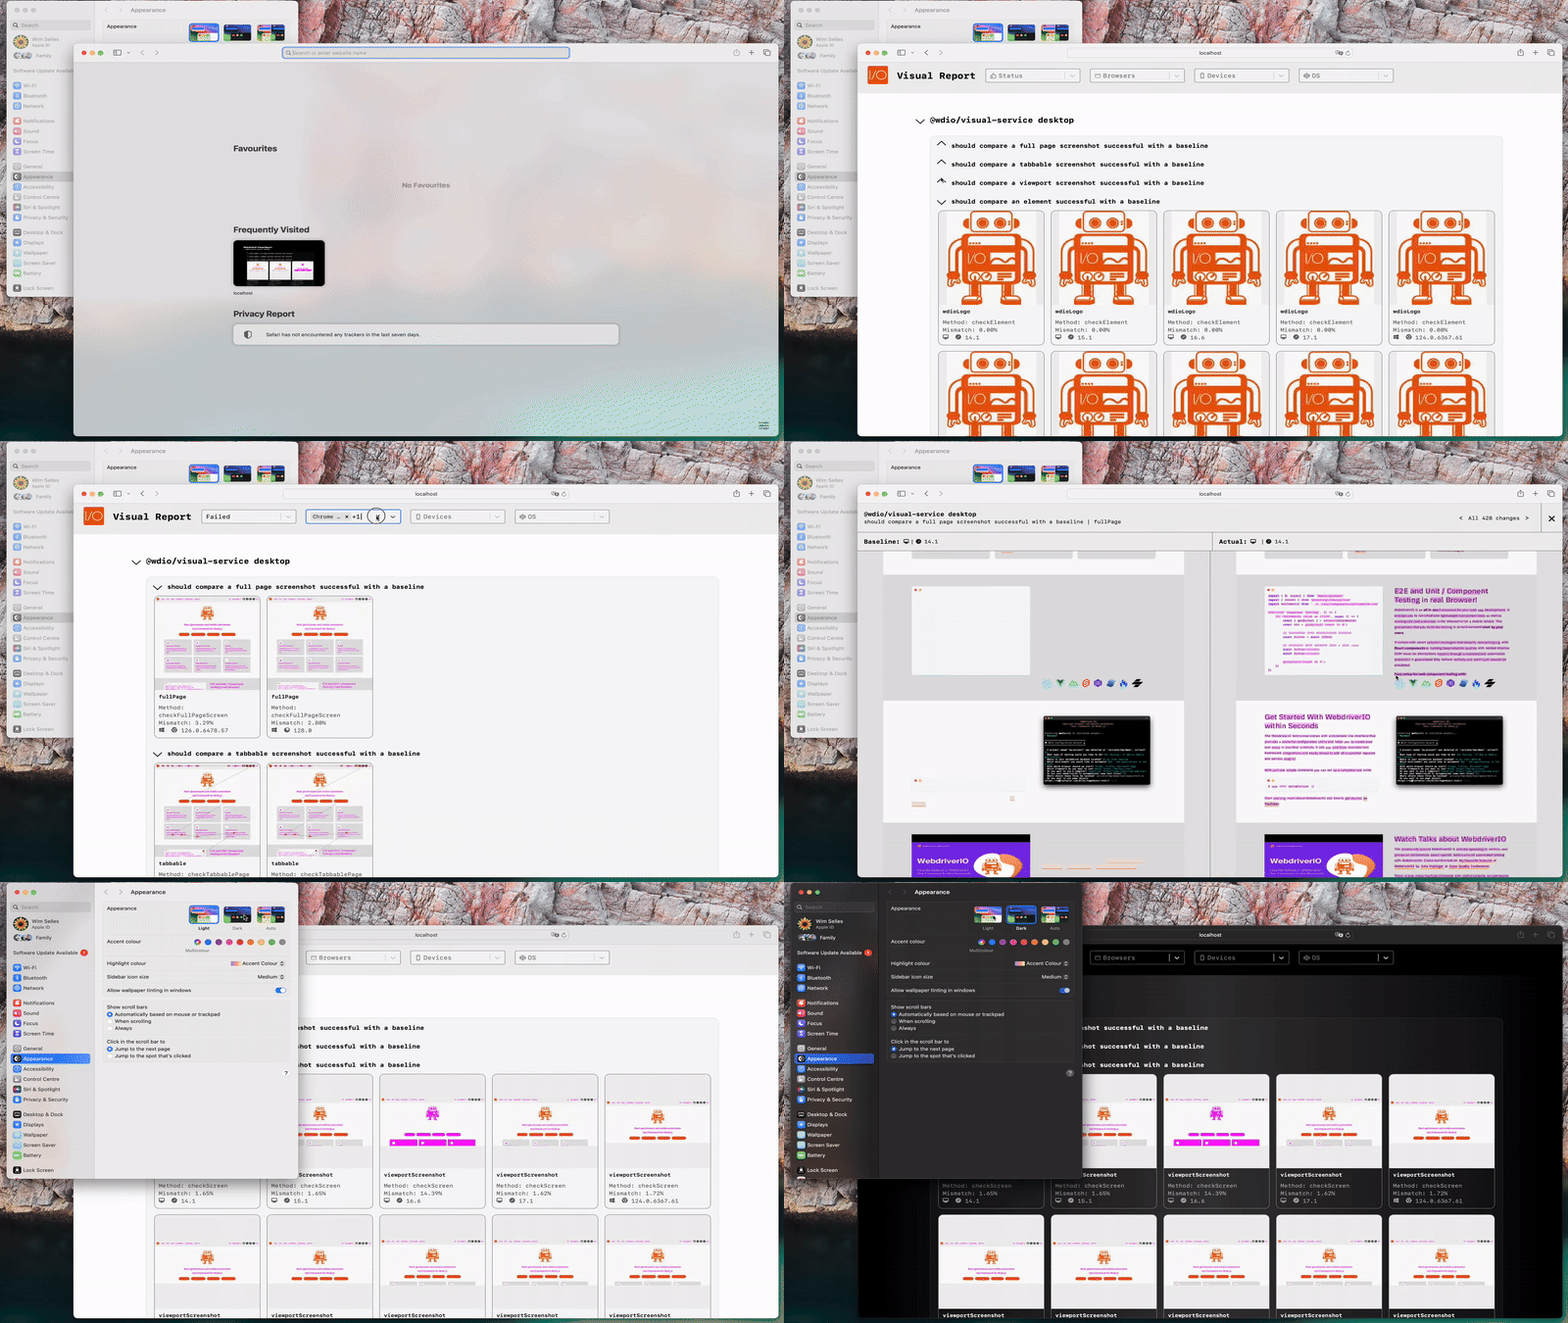
گزارشگر بصری ویژگی جدیدی است که در @wdio/visual-service از نسخه v5.2.0 معرفی شده است. این گزارشگر به کاربران امکان میدهد گزارشهای JSON diff ایجاد شده توسط سرویس تست بصری را مشاهده کرده و آنها را به فرمتی قابل خواندن برای انسان تبدیل کنند. این ابزار به تیمها کمک میکند تا نتایج تست بصری را با ارائه رابط گرافیکی برای بررسی خروجی، بهتر تحلیل و مدیریت کنند.
برای استفاده از این ویژگی، اطمینان حاصل کنید که پیکربندی مورد نیاز برای تولید فایل output.json را دارید. این سند شما را در راهاندازی، اجرا و درک گزارشگر بصری راهنمایی میکند.
پیشنیازها
قبل از استفاده از گزارشگر بصری، مطمئن شوید که سرویس تست بصری را برای تولید فایلهای گزارش JSON پیکربندی کردهاید:
export const config = {
    // ...
    services: [
        [
            "visual",
            {
                createJsonReportFiles: true, // تولید فایل output.json
            },
        ],
    ],
};
برای دستورالعملهای راهاندازی دقیقتر، به مستندات تست بصری WebdriverIO یا createJsonReportFiles مراجعه کنید.
نصب
برای نصب گزارشگر بصری، آن را به عنوان وابستگی توسعه به پروژه خود با استفاده از npm اضافه کنید:
npm install @wdio/visual-reporter --save-dev
�این کار اطمینان میدهد که فایلهای لازم برای تولید گزارش از تستهای بصری شما در دسترس هستند.
استفاده
ساخت گزارش بصری
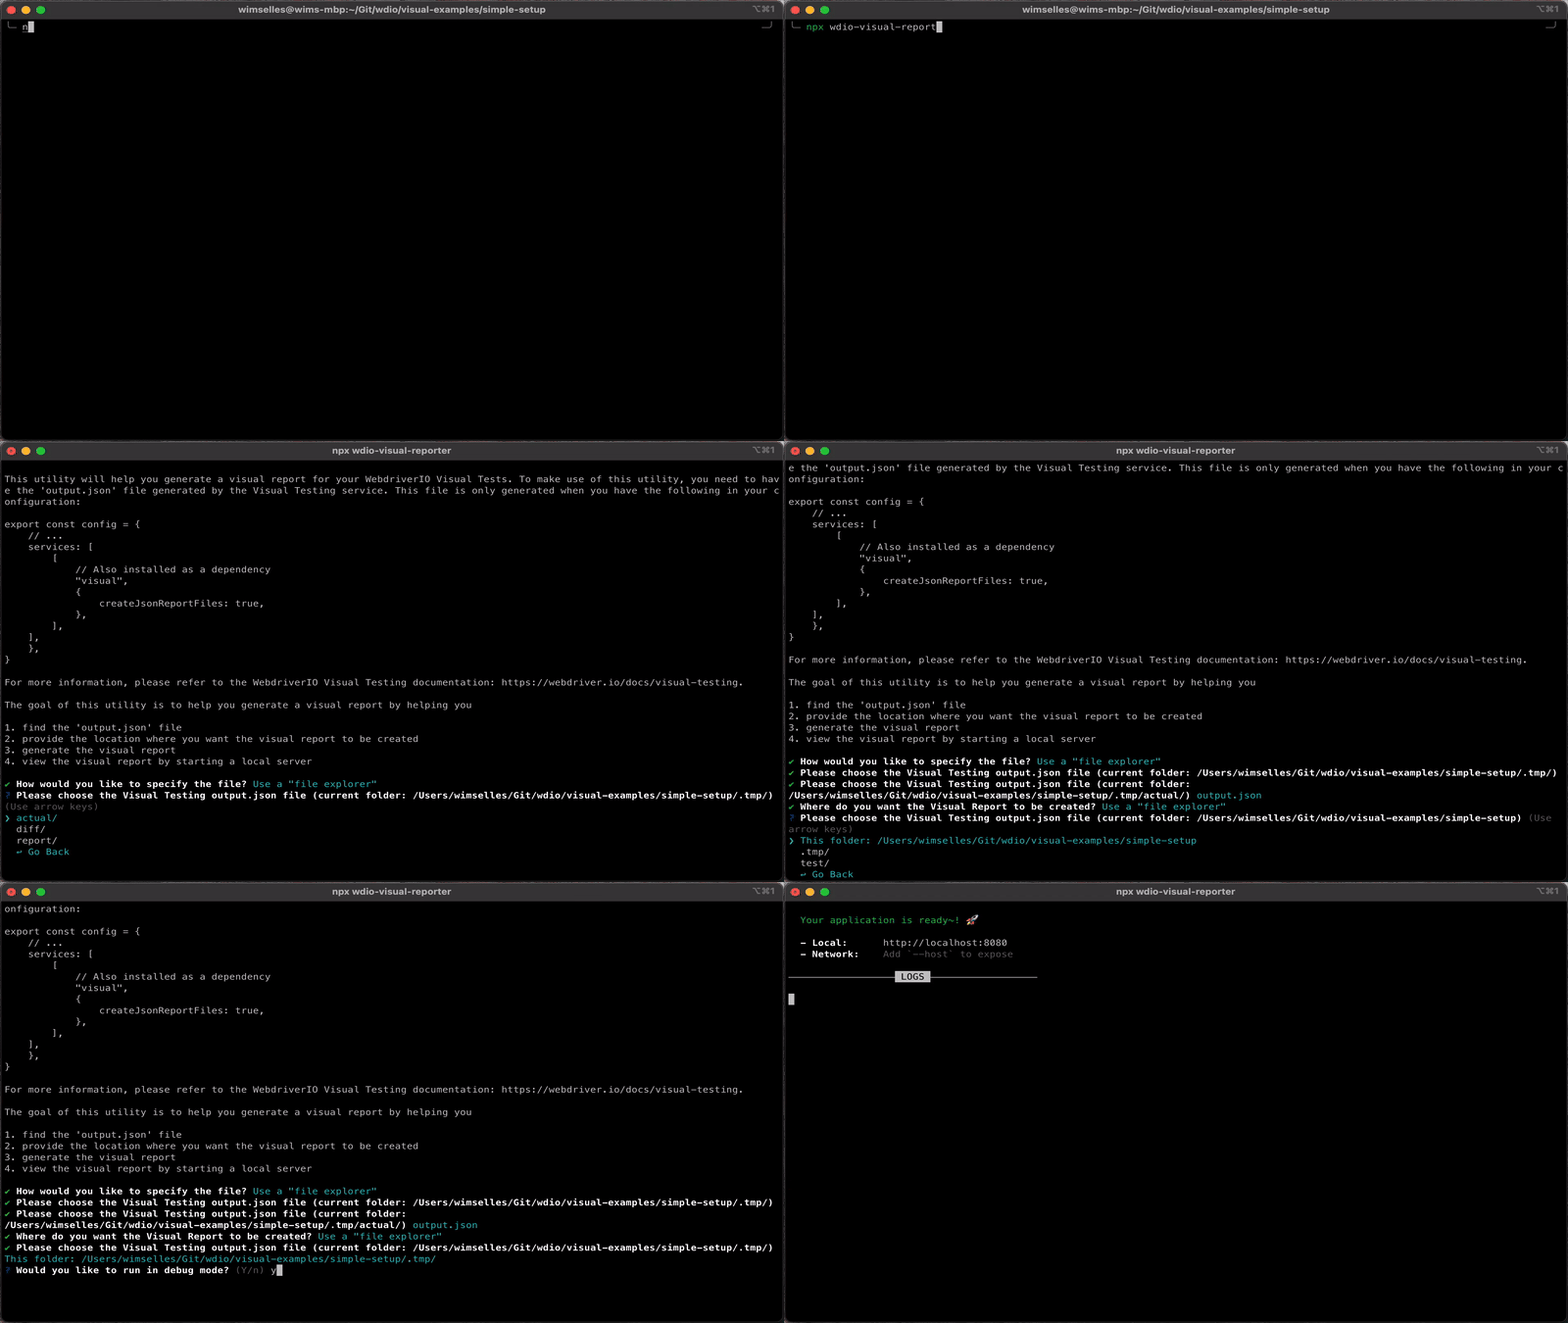
پس از اجرای تستهای بصری و تولید فایل output.json، میتوانید گزارش بصری را با استفاده از CLI یا پیامهای تعاملی بسازید.
استفاده از CLI
میتوانید از دستور CLI برای تولید گزارش با اجرای:
npx wdio-visual-reporter --jsonOutput=<path-to-output.json> --reportFolder=<path-to-store-report> --logLevel=debug
گزینههای ضروری:
--jsonOutput: مسیر نسبی به فایلoutput.jsonتولید شده توسط سرویس تست بصری. این مسیر نسبت به دایرکتوریای است که دستور را از آن اجرا میکنید.--reportFolder: دایرکتوری نسبی که گزارش تولید شده در آن ذخیره خواهد شد. این مسیر نیز نسبت به دایرکتوریای است که دستور را از آن اجرا میکنید.
گزینههای اختیاری:
--logLevel: تنظیم رویdebugبرای دریافت لاگهای دقیق، بهویژه برای عیبیابی مفید است.
مثال
npx wdio-visual-reporter --jsonOutput=/path/to/output.json --reportFolder=/path/to/report --logLevel=debug
این دستور گزارش را در پوشه مشخص شده تولید میکند و بازخورد را در کنسول نمایش میدهد. برای مثال:
✔ Build output copied successfully to "/path/to/report".
⠋ Prepare report assets...
✔ Successfully generated the report assets.
مشاهده گزارش
باز کردن مستقیم path/to/report/index.html در مرورگر بدون سرو کردن آن از یک سرور محلی کار نخواهد کرد.
برای مشاهده گزارش، باید از یک سرور ساده مانند sirv-cli استفاده کنید. میتوانید سرور را با دستور زیر شروع کنید:
npx sirv-cli /path/to/report --single
این دستور لاگهایی مشابه مثال زیر تولید میکند. توجه داشته باشید که شماره پورت ممکن است متفاوت باشد:
Your application is ready~! 🚀
- Local: http://localhost:8080
- Network: Add `--host` to expose
───────────�─────── LOGS ──────────────────
اکنون میتوانید با باز کردن URL ارائه شده در مرورگر خود، گزارش را مشاهده کنید.
استفاده از پیامهای تعاملی
به طور جایگزین، میتوانید دستور زیر را اجرا کرده و به پیامها برای تولید گزارش پاسخ دهید:
npx @wdio/visual-reporter
پیامها شما را در ارائه مسیرها و گزینههای مورد نیاز راهنمایی میکنند. در پایان، پیام تعاملی همچنین از شما میپرسد که آیا میخواهید سروری برای مشاهده گزارش شروع کنید. اگر تصمیم بگیرید سرور را شروع کنید، ابزار یک سرور ساده راهاندازی کرده و URL را در لاگها نمایش میدهد. میتوانید این URL را در مرورگر خود باز کنید تا گزارش را مشاهده کنید.


مشاهده گزارش
باز کردن مستقیم path/to/report/index.html در مرورگر بدون سرو کردن آن از یک سرور محلی کار نخواهد کرد.
اگر شروع سرور از طریق پیام تعاملی را انتخاب نکردید، هنوز هم میتوانید با اجرای دستور زیر به صورت دستی گزارش را مشاهده کنید:
npx sirv-cli /path/to/report --single
این دستور لاگهایی مشابه مثال زیر تولید میکند. توجه داشته باشید که شماره پورت ممکن است متفاوت باشد:
  Your application is ready~! 🚀

  - Local:      http://localhost:8080
  - Network:    Add `--host` to expose

────────────────── LOGS ──────────────────
اکنون میتوانید با باز کردن URL ارائه شده در مرورگر خود، گزارش را مشاهده کنید.
نمایش گزارش
برای دیدن نمونهای از نحوه نمایش گزارش، از دموی GitHub Pages ما بازدید کنید.
درک گزارش بصری
گزارشگر بصری نمایی سازمانیافته از نتایج تست بصری شما ارائه میدهد. برای هر اجرای تست، قادر خواهید بود:
- به راحتی بین موارد تست حرکت کرده و نتایج تجمیعی را مشاهده کنید.
- متادیتا مانند نامهای تست، مرورگرهای استفاده شده و نتایج مقایسه را بررسی کنید.
- تصاویر diff نشان دهنده مکانهایی که تفاوتهای بصری شناسایی شدهاند را مشاهده کنید.
این نمایش بصری، تحلیل نتایج تست شما را سادهتر میکند و شناسایی و رفع رگرسیونهای بصری را آسانتر میکند.
ادغام با CI
ما در حال کار بر روی پشتیبانی از ابزارهای CI مختلف مانند Jenkins، GitHub Actions و غیره هستیم. اگر دوست دارید به ما کمک کنید، لطفاً با ما در Discord - Visual Testing تماس بگیرید.
